“Procreate” Silhouette DIY Embroidery Project

“A blockquote highlights important information, which may or may not be an actual quote. It uses distinct styling to set it apart from other content on the page.”
Birthday Gifts are Supplemental
I’m a big believer that birthday gifts as an adult are really only supplemental to the cause. You’re not expected to get someone a gift much these days because usually the activity requires a cost. Speaking from a New York City perspective at least. But I still love the idea of picking something up from a local boutique, bringing surprise cupcakes to sing on, or my personal favorite, a handmade gift.
My brother and I are 10 days apart in birthdays but four years apart in time. We’ve rarely been able to spend birthdays together since I went to college and he was already attending grad school in another state. This year for my 27th birthday and his 31st we’re a mere few states away from each other so I booked a house in the woods of Pennsylvania and we’re going to meet in that week in between. He recently adopted a dog with his long-time girlfriend who I have yet to meet so I wondered how I could create a gift for him that incorporated ‘Meeko’ without the kitschy “dad dog” things I knew he wouldn’t vibe with.
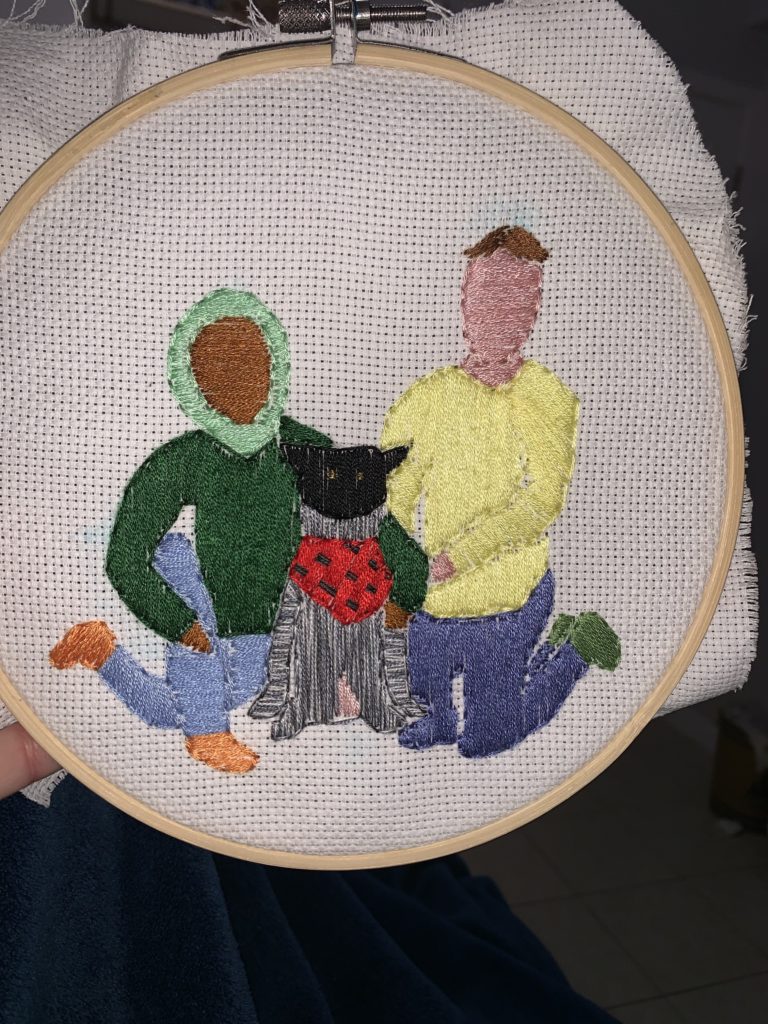
This is what I came up with! I saw a bunch of those “procreate graphics” on social media but I don’t have an iPad nor the patience to stare at the details. What I do have is an imagination and a water soluble market which allows me to make mistakes! I’ll explain all my mistakes and better judgement here so you can try on your own.

Materials Needed
I love crafting but I lost a lot of my joy during quarantine and winter but the other weekend I decided it was time to find joy again! I masked up, boarded the subway which I hadn’t done in months, and went to the Michael’s store. I had never understood how people would boast about walking into Target and spending $200 on things they didn’t even need but this day I let myself feel joy again and got to the register with almost $70 of projects. Don’t worry there’s coupons online and embroidery is probably one of the cheapest crafts to do.
What you’ll need is:
- Embroidery Hoop (I’d recommend 8 inches or larger for this project)
- Aida Cloth
- Embroidery Needles
- Embroidery Thread (These are just some colors but you can purchase them individually in the store)
- Water Soluble Marker
- Power of Imagination
- Optional frame if you’d like to present it this way

Let’s Get Started
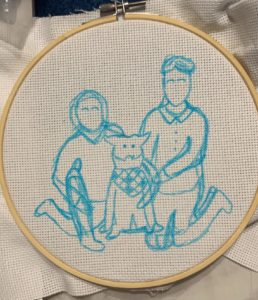
I’d recommend drawing a rough draft on a similarly sized piece of paper first. Then draw your masterpiece onto the Aida cloth that’s secured into an embroidery hoop.
The best part about this project is the marker is water-soluble so by the end all of this blue won’t be there!
You’ll see in the next images that I didn’t stick to the collar and button up design. Instead I made it all one shirt to match a hoodie he loves. For little details, you can erase them with water on a q-tip.
I’d also like to assume if you do have an iPad and know how to create a silhouette image on procreate then you can trace over that.

Start Embroidering
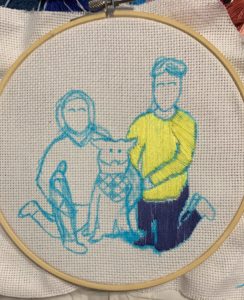
Pick the colors you want for each and start embroidering! I’ll be honest, I’m not sure if I do embroidery the proper way but I grew up sewing and I consider this longer, designed sewing projects.
The Aida cloth works well for embroidery because you’re able to match the straight lines and go from top to bottom with ease. You’ll also thread a line through the holes of the aida cloth. When prepping your needle and thread you’ll split the thread color in half to have 3 pieces of thread each.
I’d recommend creating dimension in your personas by changing the direction for certain parts. For example, I made the arm in horizontal lines but made the full body vertical and I applied that to the dog and other person.
*Miscellaneous tip for dogs or animals, mix threads together to create your own 3 colors in one!

Borders
After you’ve sewn all of the primary elements of your project, it’s time to create a polished look and add borders. This is where those mistakes I learned from come in. I thought I wanted to create an elegant border in black but I ended up hating it.
Adding the same color border helped make it look complete and finished without too much change to the eye so you can’t really tell what’s been done.
I did a simple backstitch for each border.

Cleaning It Up
This is where another mistake I made is going to help you.
I tried to clean off the water-soluble marker with a q tip and water and it looked great but then the next day I had an almost panic attack when the white dog fur was blue and it had bled through the yellow shirt.
Then I took the risk…I ran the project under a light stream of water from the sink in the embroidery hoop and it’s beautiful and perfect so I’d highly recommend this tactic for the final project.

Enjoy the Final Product!
Now you’re ready with a beautiful gift for someone you love! It’s a really adjustable project, you can use a larger hoop, leave the finished project in it, and present it as a wall frame or you can take it out and frame it. You could also use a smaller hoop for a single silhouette for a much shorter project!